


10,000 lb asymmetric 2-post — the daily-driver lift for general service shops handling cars and 1/2-ton trucks.
Key Features
- 10,000 lb capacity, ALI Certified
- 31 variant combinations across height × color × voltage × accessory pkg
- Versymmetric arms — rotating arms position to any vehicle layout
- 4in / 3,500 PSI concrete, 11'8" min ceiling
- 208-230V 1Ph or 3Ph available
- Available in Standard 11'8", Tall 12'6", XT 14' column heights
Best For Shops That
- Service cars + 1/2-ton trucks daily
- Have 11'8"+ ceiling clearance
- Want versymmetric arms for mixed fleet (rotating arms fit any vehicle position)
Do Not Buy If
- Your ceiling is under 11ft — see CLFP9 (low-ceiling variant).
- You only lift 3/4-ton+ trucks — see CL12A.
- You need a budget option — see VLE10.
Specifications
- Capacity: 10,000 lb
- ALI Certified: Y
- Min Ceiling: 144
- Concrete: 4" / 3500 PSI
Challenger CL10AV3 10K 2-Post
Quick application by phone. We confirm your lift & install first, then our finance partner finalizes — subject to credit approval.
We deliver, install, and certify your lift — turnkey. Enter your ZIP for an installed price (local installs cost less; we charge more the farther we travel).
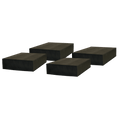
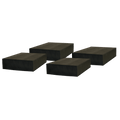
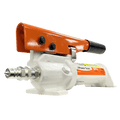
Compatible Accessories
Only accessories that fit the Challenger CL10AV3 10K 2-Post are shown. Checked items add to your order total.

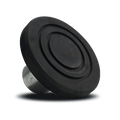
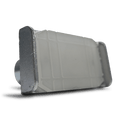
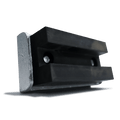
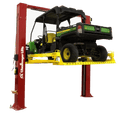
Quote, Spec Sheet, and Preparation Checklist
Print this for your install crew or your budget meeting.
Your Configuration
| Lift model | Challenger CL10AV3 — 10K 2-Post Service Lift |
| Configuration | Standard CL10AV3, finished in Black |
| Voltage | 208-230V single phase |
| Capacity | 10,000 lb |
| ALI Certified | Yes |
| Lift price | $7,382.06 |
| Estimated total | $7,382.06 |
| Freight | Included |
| Quote valid | 30 days |
Bay Requirements
| Ceiling height needed | 11’10” |
| Bay width (minimum) | 12’ 6” |
| Bay depth (recommended) | 24’ |
Concrete spec
- 4” minimum thickness, 3,500+ PSI compressive strength
- Steel-reinforced, cured at least 28 days
- Level within 3/8” over the install area
- No anchor placement within 8” of any crack, edge, or expansion joint
Air supply: Not required (CL10 uses manual lock release)
Electrical: 208-230V single-phase, dedicated 20A breaker (see Electrical block below)
We’ll ship you our concrete test tool so you can verify your slab before you commit. $250 deposit is fully refundable when you return the tool within 30 days. You cover return shipping.
Pad Heights — How Low Can You Go?
Minimum pad height determines whether a lift can pick up low-profile vehicles. Lower is better for sports cars and lowered vehicles.
| CL10AV3 (arms) | 3-7/8” min – 6-1/8” max |
| CLFP9 | 4” min – 6” max |
| VLE10 | 4-1/4” min – 6-3/4” max |
| CL12A | 5” min – 12-5/8” max (with included 6” stack adapter) |
Install Coordination & Rough Ballpark
Typical installer cost for this lift: $1,100 – $1,600
What that ballpark covers: standard install on a clean slab with electrical already run to the bay.
What it does NOT cover:
- Removing your existing lift
- Moving equipment that’s currently attached to the lift you’re replacing
- Electrical work (separate licensed electrician — see Electrical block)
- Concrete repairs or new pad pour
- Location-driven variation (rural deliveries, urban access, multi-floor, etc.)
Two paths:
(a) Find your own installer. We can refer one in your area — call us if you need a recommendation. You’ll handle scheduling and payment direct with the installer.
(b) Let us coordinate the install.
We schedule the installer, handle warranty registration after install, and do a post-install inspection. The $499 deposit is applied to your final install bill. If we can’t find an installer in your area, the deposit is fully refunded.
What to Watch Out For
Above the lift — check at the FRONT and REAR of where the vehicle will land, not just over the columns.
The vehicle’s hood and trunk extend past the lift columns when raised. Anything mounted to the ceiling in those zones can hit the vehicle before the lift reaches full rise.
Look for:
- Garage door opener motor + the door panels themselves when the door is fully open
- Exhaust ventilation hoods or snorkels
- Shop lights and fixtures
- Compressed air piping
- Existing hose reels (especially if you’re replacing an old lift)
- HVAC ducts, heaters, radiant heaters
- Roof rafters, beams, mezzanine edges
Below the lift — check the slab where the columns will anchor:
- Visible cracks within 8” of where anchors will go (deal-breaker)
- Existing anchor bolt holes from an old lift (require relocation or epoxy filling)
- Old inground-lift concrete patches — the patch may not be rebarred to the surrounding slab; treat the patch as unreliable
- In-floor radiant heat — hydronic tubing under the slab can be punctured by anchor drilling. Get utility locates before drilling.
- Floor drains and how the floor slopes toward them — affects lift positioning
- Buried electrical conduit — get utility locates
- Old concrete (20+ years) can have hidden fractures — visible-OK doesn’t mean structural-OK. The concrete test tool catches this.
Rules of thumb:
- Never reuse existing anchors from a prior lift install.
- If installing near old anchor holes, pour anchor bolt epoxy into the new hole before driving in the wedge anchor. The epoxy bonds the anchor into compromised concrete that wedge action alone can’t grip.
Electrical Recommendations
The CL10AV3 runs on 208-230V single-phase, 20-amp dedicated circuit (motor is 2 HP standard, 3 HP if you chose Quick Cycle).
Hire a licensed electrician for hookup. Most installers are not certified electricians, so plan on the electrical as a separate trade.
One breaker per lift. Running two lifts off one breaker will trip the breaker as soon as both run at the same time, and it makes future service harder. Budget for a dedicated circuit per bay.
Don’t hard-line conduit directly to the lift body. Electricians sometimes run mounting bolts into the lift housing to anchor conduit, which damages internals or makes the lift jump during operation.
Strongly recommended: loose “whip cord” with twist-lock plug, hanging from the ceiling.
Why:
- Gives you slack if the lift install location ends up a foot off from planned (it happens — concrete inspections, anchor positions, existing equipment can all push the final location around)
- Eliminates the need for a separate shop disconnect switch on the wall — techs just unplug the pump when servicing
- Easier to swap out the power unit later without bringing the electrician back